ProxyTee Usage Guide
This ProxyTee usage guide walks you through everything you need to know to get started configure your proxies and test them. It offers a clear step by step walkthrough to help you unlock the full power of your account from sign up to real world proxy usage.
Getting Started with Your ProxyTee Account
Before diving into proxy management, you’ll first need to create and activate your ProxyTee account. Follow these simple steps to get fully operational.
1️⃣ Register and Sign In
If you don’t already have an account, sign up on ProxyTee in under a minute. After registration, proceed to sign in to access the dashboard.
2️⃣ Open Your Dashboard
Once signed in, head directly to your ProxyTee dashboard. This will be your main hub where all purchased proxies and management features are displayed.
3️⃣ Access Your Trial or Purchase a Plan
If you’ve been provided a trial, you’ll find pre-assigned proxies waiting for you in the dashboard. Simply refer to the section titled Proxy Usage Guide below to begin using them.
If you don’t have a trial yet, click the Buy Product button on the dashboard to explore available proxy packages.
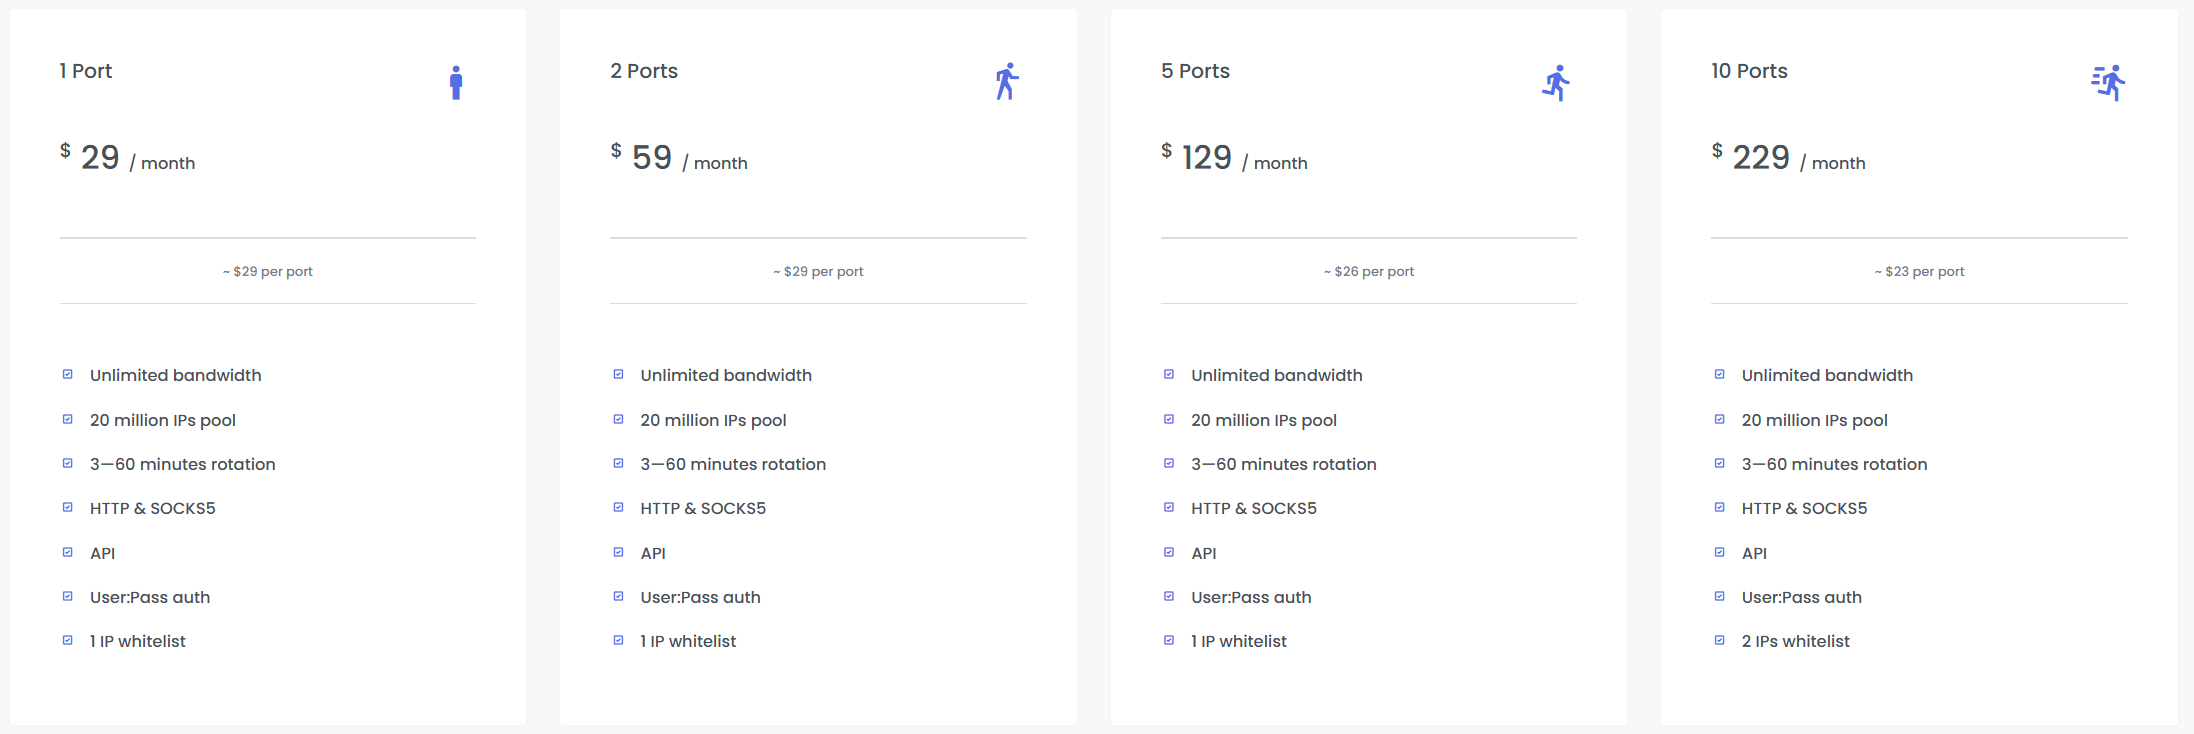
4️⃣ Select Your Proxy Package
Choose from a variety of port packages that fit your scale — 1 port, 2 ports, 5 ports, 10 ports, 25 ports, 50 ports, 100 ports, or more. For larger or customized needs, simply contact the ProxyTee team.
5️⃣ Choose Your Payment Method
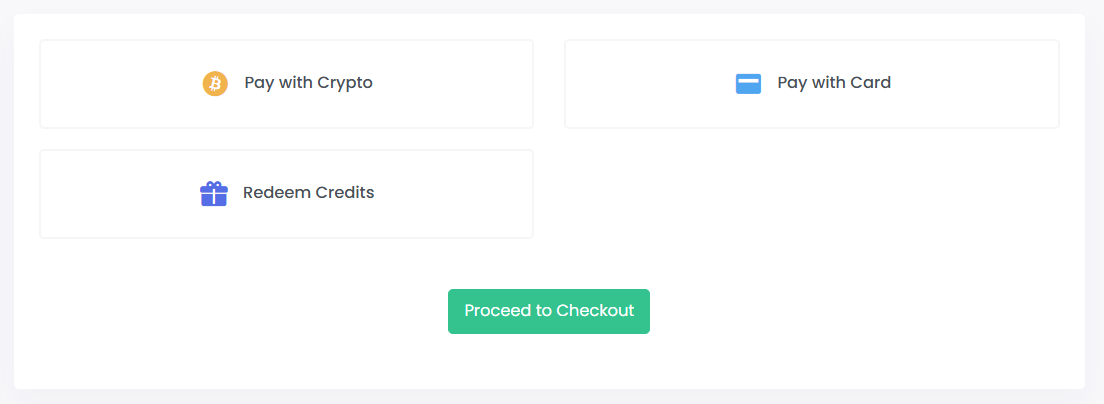
ProxyTee offers flexible payment options:
- Pay with cryptocurrency
- Pay with credit or debit card
- Redeem credits (if you already have balance in your account)
Once you’ve selected your method, click Proceed to Checkout.
6️⃣ Activate Your Proxies
After successful payment, your purchased proxy ports will automatically appear in your dashboard. Please allow a few seconds for the system to establish and activate the new proxies you purchased.
Once they are ready, you can begin configuring and deploying them right away.
How to Configure Your Proxies
Welcome to your ProxyTee dashboard! This intuitive interface gives you complete control over your proxy services. As you can see here, all your purchased proxies are neatly organized in a clear table.
For each proxy, you get essential information at a glance, including its Name, the specific Address (IP address), the number of Ports available, and whether security features like Whitelist and User-Pass authentication are active. Need to target a specific region? The Country column show where your proxy server is situated. Never miss an interruption with the Expiration Date column, which keeps you informed about your subscription status. Here’s an overview of each field displayed:
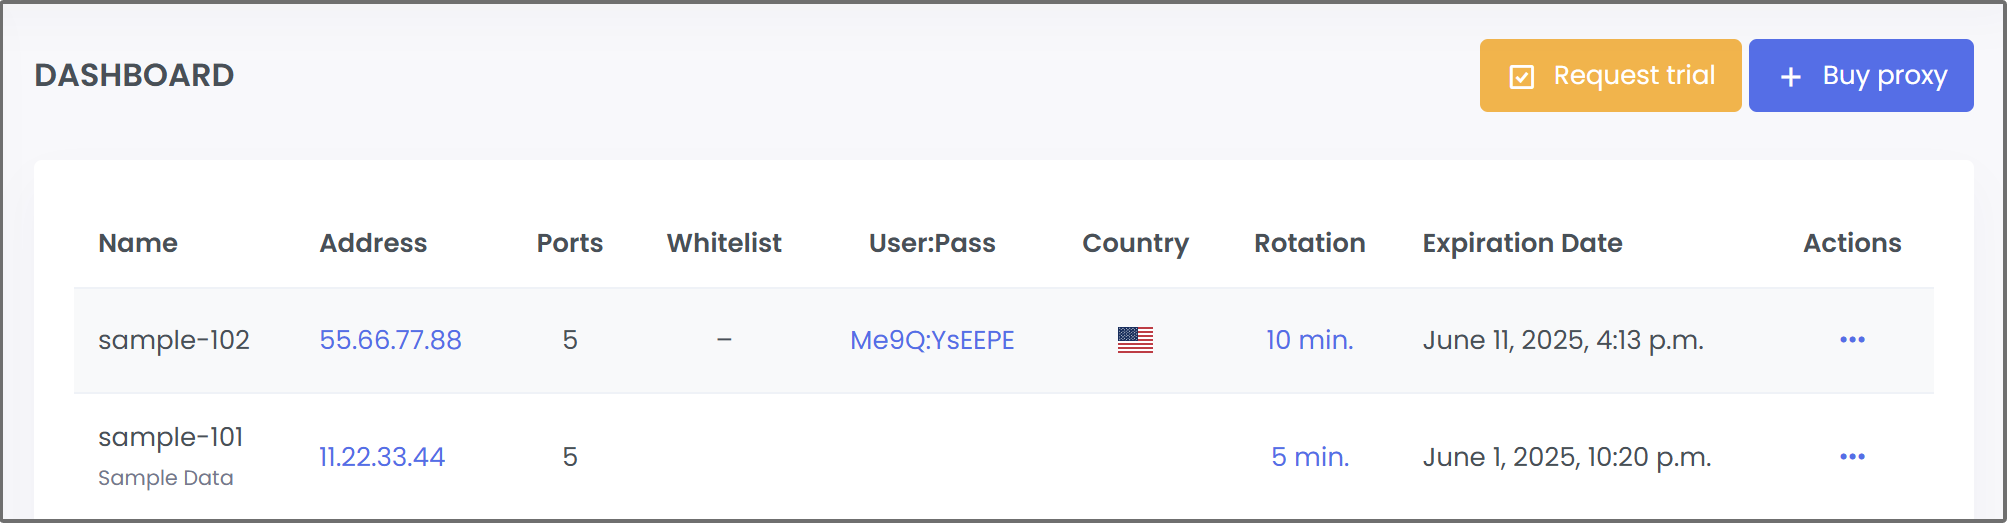
Name
This is a fixed identifier automatically assigned to your proxy, based on your account name. It cannot be changed and helps you easily identify and manage your proxies.
Address & Ports
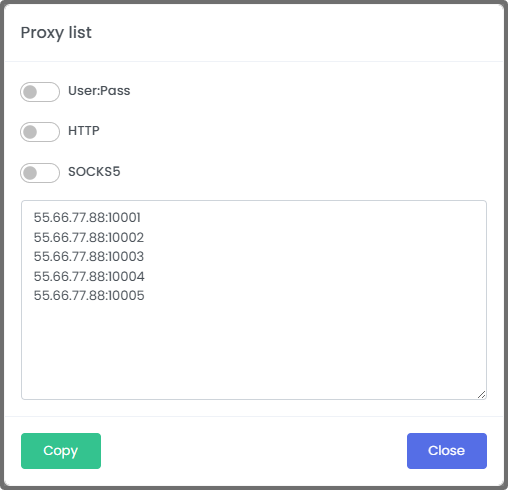
The IP address and the number of ports associated with your proxy. You will use this IP and its ports in your browser or application to connect.
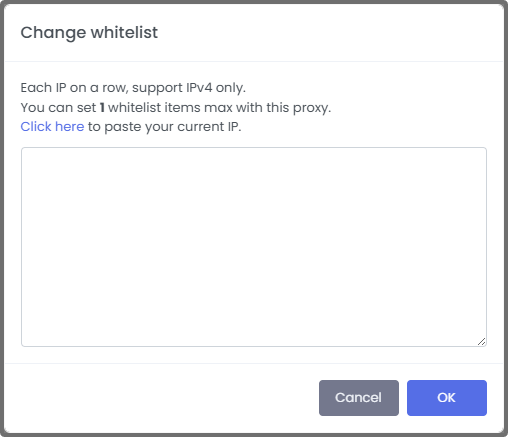
Whitelist
Whitelist allows you to specify which IP addresses are permitted to access your proxy. By adding your device’s IP to the whitelist, you ensure only authorized connections can use the proxy, enhancing security and preventing unauthorized usage.
User:Pass
User:Pass authentication lets you secure your proxy by requiring a username and password before access is granted. This method ensures that only users with the correct credentials can connect, offering an extra layer of control and flexibility when accessing your proxies from different networks or devices.
Country
The Country setting lets you assign a specific geographic location to your proxy. Choosing a target country is essential for accessing content, websites, or services that are restricted or tailored to that region. It ensures that your proxy traffic appears to originate from the selected country, making it effective for tasks like localized data gathering, ad verification, or bypassing geo-restrictions. A country must be selected for the proxy to function properly.

Rotation
The Rotation feature controls how often the IP address of your proxy changes. By enabling IP rotation, you can automatically switch to a new IP at set intervals or after each connection. This helps reduce the risk of blocks or bans, improves anonymity, and supports large-scale tasks like web scraping or ad verification. It ensures your activities appear to come from multiple IPs rather than a single, static address.
Expiration Date
The Expiration Date indicates how long your proxy access will remain active. It shows the exact date when your purchased proxy ports will expire and become unavailable for use. Keeping track of this date helps you manage renewals on time, ensuring uninterrupted service and continuous access to your proxy resource
Actions
A dropdown menu providing several actions that can be performed on this specific proxy:
- Pin: Pin your favorite proxies for quick access.
- Notes: To add or view notes related to this proxy.
- Orders: To view order details or related orders for this proxy.
- Renew: Easily Renew your subscription before it expires.
How to Set Up a Proxy in Chrome
Option 1️⃣: Set up Proxy via Chrome’s System Settings
For Windows
-
Open Chrome → Click the 3 dots (top-right) → Settings
-
Scroll down and click System → Click Open your computer’s proxy settings
-
In Windows Proxy Settings
-
Turn on “Use a proxy server” under Manual proxy setup
-
Enter your proxy IP address and port
-
Click Save
-
-
Done! Chrome will now route traffic through the proxy.
For macOS
-
Open Chrome → Go to Settings → System → Open your computer’s proxy settings
-
It opens macOS Network settings
-
Select your network (Wi-Fi or Ethernet)
-
Click Advanced → Proxies tab
-
Check Web Proxy (HTTP) or Secure Web Proxy (HTTPS)
-
Enter proxy IP address and port
-
-
Click OK → Apply
-
Done! Chrome now uses the proxy.
Option 2: Use a Chrome Proxy Extension (Recommended)
This is easier if:
-
You want per-site proxy rules
-
You use rotating proxies
-
You don’t want to affect your entire system
Steps
-
Install a proxy manager extension
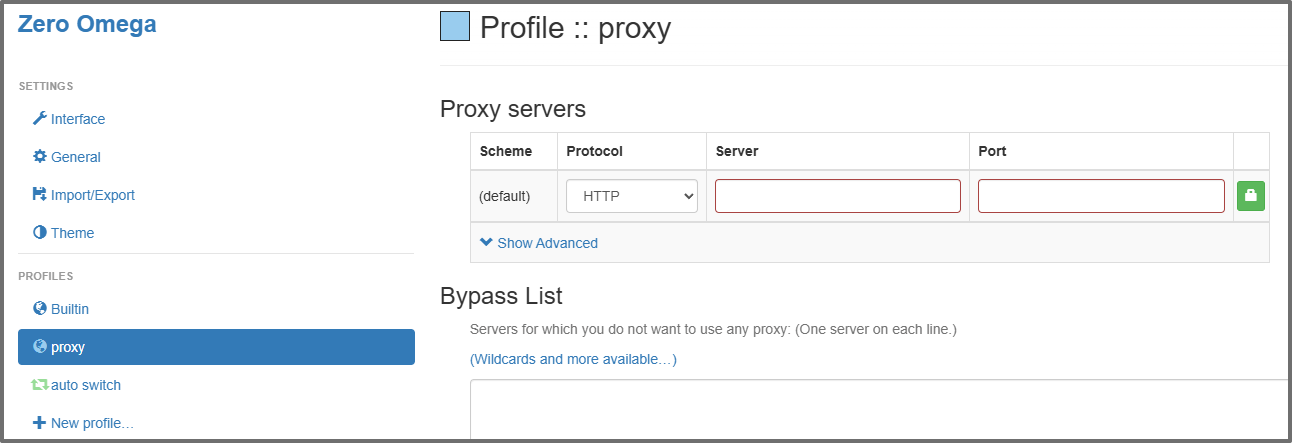
Example: Proxy SwitchyOmega -
Click the extension icon → Open Options
-
Create a New Profile (Type = Proxy)
-
Enter your proxy server (IP/hostname + port)
Choose type: HTTP / HTTPS / SOCKS5
(Enter username/password if your proxy requires auth) -
Save the profile
-
Use the extension to quickly switch proxies or configure auto-rules
Testing Your Proxy
Once configured, it’s important to confirm your proxy is active. You can:
-
Visit whoer.net to see your new IP location and anonymity score
-
Or, run a quick terminal check using
curl:
This command will return your current IP address and location, which should reflect the ProxyTee proxy you configured.