How to Set Up a Proxy in SwitchyOmega (Step-by-Step Guide)
SwitchyOmega is one of the easiest and most effective tools to manage multiple proxy profiles directly within your browser. Whether you’re boosting online privacy, accessing geo-restricted content, or running data scraping tools, SwitchyOmega simplifies toggling between proxy configurations without hassle. You will learn how to set up a proxy in SwitchyOmega step by step that will help you get the most out of this powerful tool
What Is SwitchyOmega and Why Use It?
SwitchyOmega is a free and widely used Chrome and Firefox extension designed to help users manage and switch between multiple proxy settings with ease. Instead of manually entering proxy configurations every time you need to change your network, you can create and manage profiles that can be switched with a single click.
- Supports multiple proxy types including HTTP, HTTPS, SOCKS4, and SOCKS5
- Easy profile switching from the browser toolbar
- Highly configurable with rules and URL patterns
- Open source and regularly updated
Now let’s move into how to set up a proxy in SwitchyOmega step by step, complete with visuals and real use case scenarios.
How to Set Up a Proxy in SwitchyOmega
Setting up a proxy in SwitchyOmega can be done in under five minutes. Here is the full process explained clearly:
1️⃣ Install the Extension.
Visit the Chrome Web Store or Firefox Add-ons page and search for “SwitchyOmega”. Click Add to Chrome or Add to Firefox to begin installation:
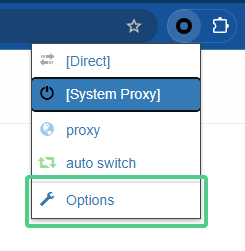
2️⃣ After installation, click the SwitchyOmega icon in your browser’s toolbar to open the dashboard.
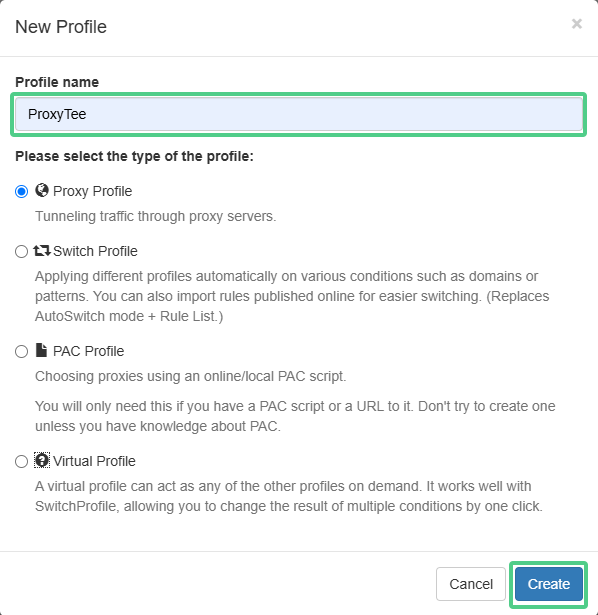
3️⃣ Click New Profile.
4️⃣ Enter a name for the profile, choose “Proxy Profile” as the type, then click Create.
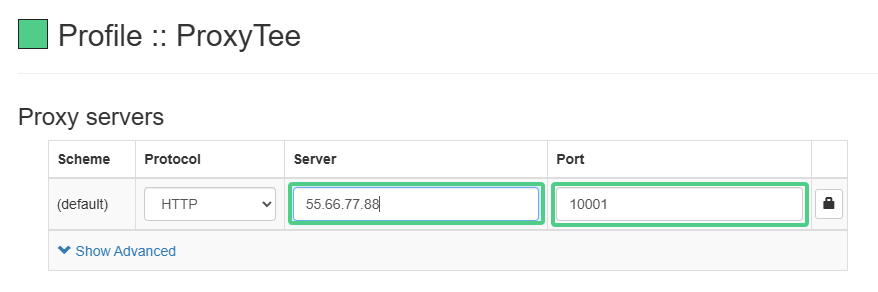
5️⃣ Configure Proxy Settings:
Under Proxy Servers, select HTTP as the protocol. Enter your ProxyTee residential proxy server details.
For example:
-
Server: 55.66.77.88
-
Port: 10001
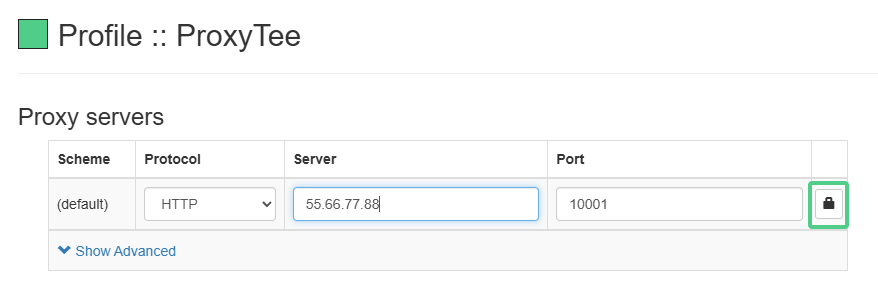
6️⃣ Click the lock icon to enable authentication.
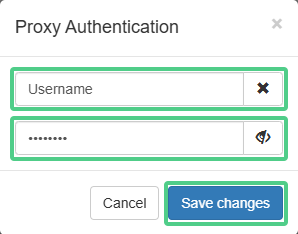
7️⃣ Enter your ProxyTee username and password, then press Save Changes.
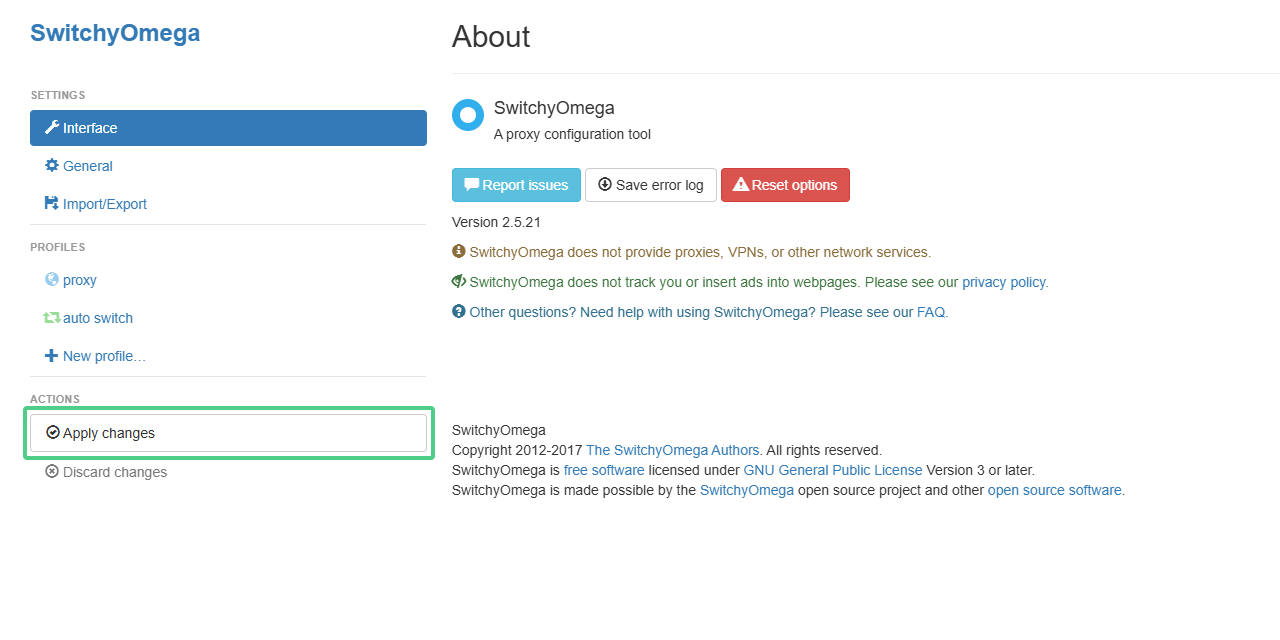
8️⃣ Click Apply Changes to finalize the setup.
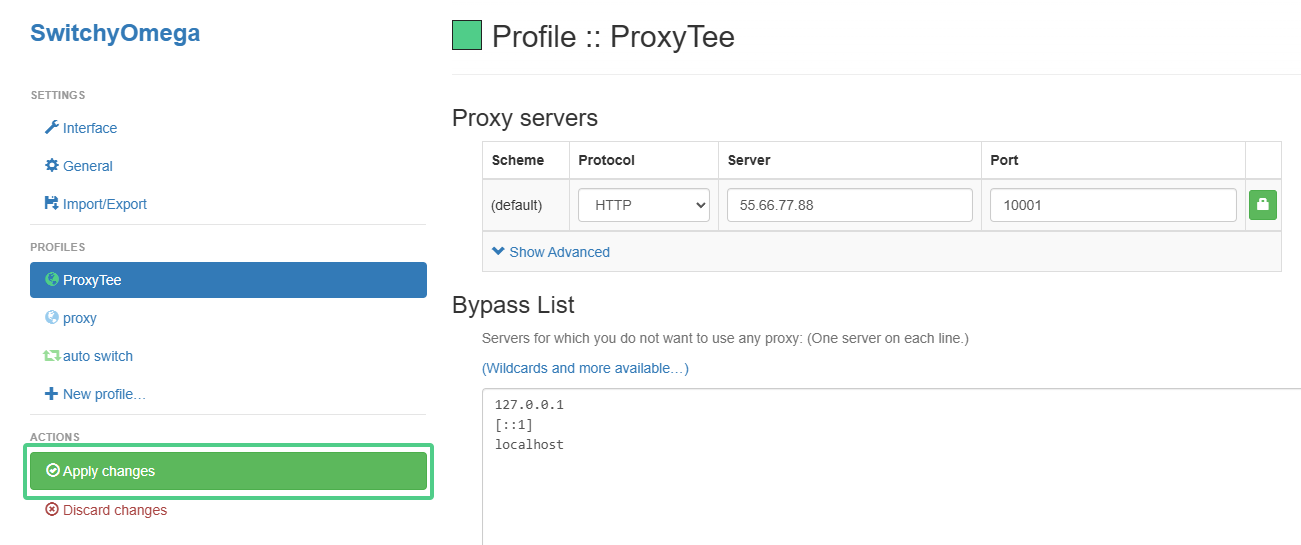
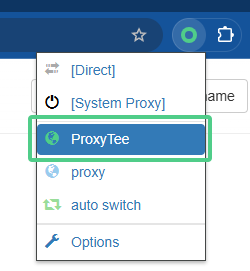
9️⃣ Finally, click the SwitchyOmega icon again and select your new proxy profile to start using it.
This is how you set up a proxy in SwitchyOmega the right way. Once completed, you are free to test different network environments, ensure data routing privacy, or access region-locked content.
Real Use Cases for SwitchyOmega and Proxy Integration
When you use SwitchyOmega, it opens up several practical possibilities. Here are a few examples:
- Web scraping and data collection: Marketers and researchers often use a unlimited residential proxy to collect public data without being blocked or throttled. SwitchyOmega allows them to switch profiles and routes quickly during tasks.
- Managing multiple social media accounts: With rotating IPs, users can manage several accounts on platforms like Facebook or Instagram safely. Pairing SwitchyOmega with ProxyTee’s auto-rotation ensures account actions appear organic.
- Bypassing geo-restrictions: Journalists and analysts use global IPs to access localized versions of websites.
- Price monitoring and comparison: E-commerce professionals need accurate, local pricing from different regions. With multiple proxy profiles set in SwitchyOmega, they can view different country sites without clearing cookies or using incognito mode.
- Faster workflow with clean interface: Users often appreciate the simple and clean GUI provided by SwitchyOmega, which makes proxy configuration less intimidating.
Tips to Get the Most Out of Your Proxy Setup
Keep these tips in mind to make sure your setup is optimized:
- Use separate profiles for different purposes: This reduces the chance of cross-traffic errors or leaks between tasks.
- Label your profiles clearly: If you’re using multiple proxies, having labels like “US-Scrape” or “EU-Ads” helps avoid confusion.
- Test each profile before intensive use: Use sites like whatismyip.com to verify the active IP and its geolocation before starting sensitive tasks.
- Rotate proxies often for bulk tasks: Especially during data scraping, rotating IPs ensures longer sessions without blocks.
Why Choose a Residential Proxy for SwitchyOmega?
When configuring SwitchyOmega, you want a proxy that won’t get you flagged. Residential proxies offer the best of both performance and legitimacy. ProxyTee’s unlimited residential proxy plans are ideal for use with SwitchyOmega because they allow users to blend in with real residential IPs while accessing sensitive platforms.
SwitchyOmega’s structure pairs perfectly with ProxyTee’s offering. From HTTP and SOCKS5 support to rotating IPs and easy setup, ProxyTee enables seamless proxy performance. If you value clean interfaces and direct control, ProxyTee and SwitchyOmega make a reliable combination. Plus, with flexible pricing, users can start with just one port and scale as needed.
Final Thoughts on How to Set Up a Proxy in SwitchyOmega
Whether you are a digital marketer, developer, or everyday user looking to stay more private online, learning how to set up a proxy in SwitchyOmega can unlock more control and flexibility over your browsing. The extension brings professional-level proxy management into a lightweight browser tool that is easy to install, configure, and scale with your needs. From regional ad testing to secure browsing, the use cases are endless. By following the steps above and applying the practical use tips, you will be set up in no time and browsing smarter with every click.